From wintips.org. If you have created a mirrored volume on Windows and do you don’t want the mirror anymore, then read this tutorial to learn how to remove or break the mirror. Before removing or breaking a mirror, it is important to understand the difference between these operations.
What is the difference between the ‘Break Mirror’ vs the ‘Remove Mirror’ option?
The “Break Mirror” operation, will stop the mirroring on the selected volume, without affecting the data on any disk. (Data will remain untouched on both disks).
The “Remove Mirror” operation, will stop the mirroring on the selected volume and destroys all the data on the mirror disk. (Data will remain only on one disk).
What option to choose? Break Mirror or Remove Mirror?
The decision between breaking or removing mirror, must be based on your needs. For example: If you need extra space on your system then choose the “remove mirror” option, but if you want to use the disk in another computer, in order to use your current Windows configuration, then you must choose the “break mirror” option. If you don’t know yet what to do, then prefer the “Break Mirror” option, which keeps all your data in both disks intact, until you decide.
In this tutorial you ‘ll find detailed instructions on how to break or remove hard drive mirroring on Windows.
How to Break Hard Disk Mirror on Windows 10, 8 or 7 OS.
To break disk mirroring:
1. Press the “Windows” ![]() + “R” keys to load the Run dialog box.
+ “R” keys to load the Run dialog box.
2. Type diskmgmt.msc and press Enter.
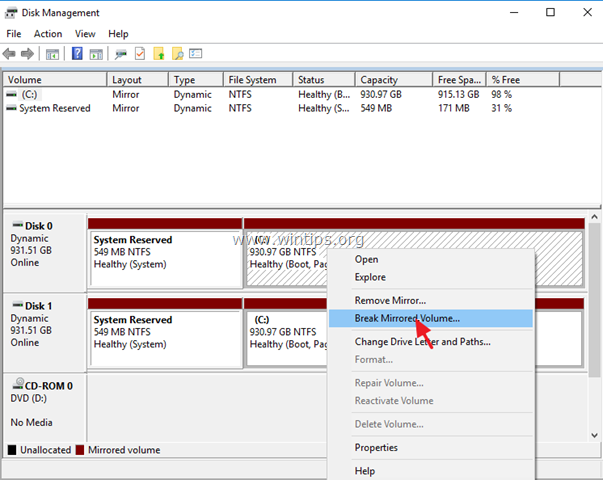
3. Right click on the Volume that you want to break the mirror and select Break Mirrored Volume.
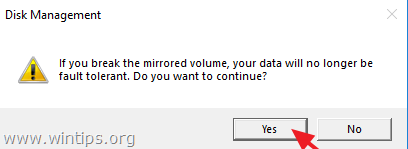
4. At the next screen, carefully read the warning message and click Yes. *
* Caution: After breaking the mirror, you data will remain on both disks but you remains will no longer be fault tolerant.
How to Remove Hard Disk Mirror on Windows 10, 8 or 7 OS.
To remove disk mirroring:
1. Press the “Windows” ![]() + “R” keys to load the Run dialog box.
+ “R” keys to load the Run dialog box.
2. Type diskmgmt.msc and press Enter.
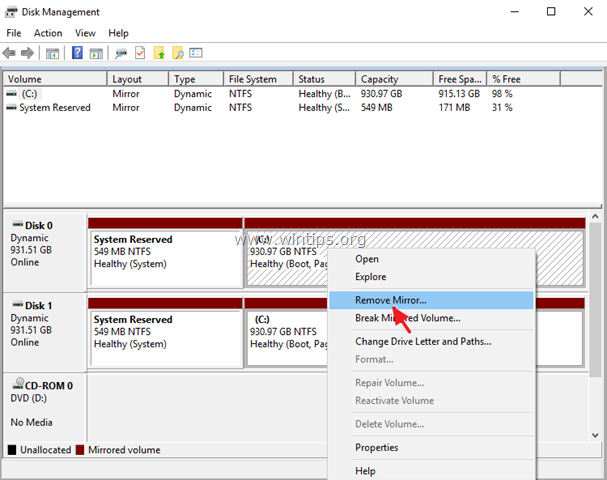
3. Right click on the Volume that you want to remove its mirror and select Remove Mirror.
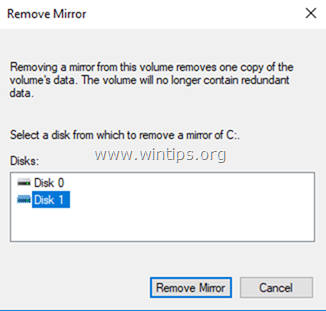
4. Carefully select from which disk you want to remove the mirror of the selected volume selected and click Remove Mirror. *
* Caution: This action will destroy all the data on the selected disk and after removal the space used for the mirror will appear as “Unallocated”.
That’s it! Let me know if this guide has helped you by leaving your comment about your experience. Please like and share this guide to help others.


