Managing Temporary Cache Space and Logs in Onguard Backup

Posted on

You can modify where temporary files are created and where logs are stored (and for how long) on Backup->Settings tab:

Similarly you can specify how many days of logs to preserve in the above folder on that same tab using the following control:

The temporary folder is used as temporary scratch working space to do things such as dump Microsoft Exchange so that eseutil can be run, to compress and uncompress files, to encrypt and decrypt files. etc.  In general, the maximum space used in the temporary folder is a little more then 3X the size of the largest file being backed up.  Since files can be processed in parallel, this factor needs to be multiplied by the number of files currently being backed up simultaneously (which is usually in the single digits).

You can control how much free space to keep on any volumes which data is written to (such as temporary folder, log folder, restore folder) via opening the GUI in expert mode and changing the following setting on the Expert Settings tab.

Advanced Settings in Onguard Backup

Posted on

There are some advanced settings you may wish to take advantage of on the Backup->Settings tab.

Onguard Remote Backup compresses files before backing them up.  The default compression level is 5 (medium) which is roughly equivalent to the same amount of compression you will see with utilities such as zip using their defaults.  A value of zero (0) means no compression and a value of 10 means maximum compression.  The compression setting you use will impact the length of time it takes to backup a file, where the higher the level of compression you specify, the longer the pre-processing of the file will take but shorter the transfer of the file will take (smaller files take less time to transfer over the Internet then larger files).

An important thing to keep in mind is that the higher level of compression you use, the less likely it will be for efficient delta-block differentials to occur, so increasing the compression level might ironically cause your backup transfer times and storage to increase over time when backing up large files which change daily.  For this reason we recommend using a setting of 5 or less for compression.

Historically, backup applications utilized the archive flags on files to determine which files have changed and need to be backed up.  When legacy backup applications encounter a file with its archive flag set, then then backup the file and clear the flag.  This legacy approach only works when users ran a single backup application — however if multiple solutions are used then the one which backs up a file clears the flag and the other doesn’t know the file has changed so it doesn’t back it up.  As a result, our software client does not look at the archive flags on files at all.  However, we allow you to specify that the software client clears the flag on each file it backs up.

There maybe occasions when certain applications, such as mysql, may need to be stopped before a backup commences, and then restarted afterward.  You can specify EXE files to execute, or command prompt commands to run, on the Backup->Settings tab as shown below.

If you are running command prompt (DOS) commands, then you’ll need to be sure to  enclose the command in double quotes and invoke the command prompt interpreter, where an example would be:
cmd /c “C:\myscripts\dumpdbs.BAT”

Since you can specify arbitrary commands, the “Test” button has no way of knowing whether the commands executed successfully, so please be sure, after using the “Test” button, that your commands accomplished what you want.  A common error when creating BAT files is forgetting to change the working directory to where your files or scripts are at the beginning of the BAT file (using the CD command).

Next Article: Monitoring Your Backups

Monitoring Your Backups and Restores using Onguard Backup

Posted on

The Monitor tab presents you with easy to visualize views of your backups and restores.

Overview

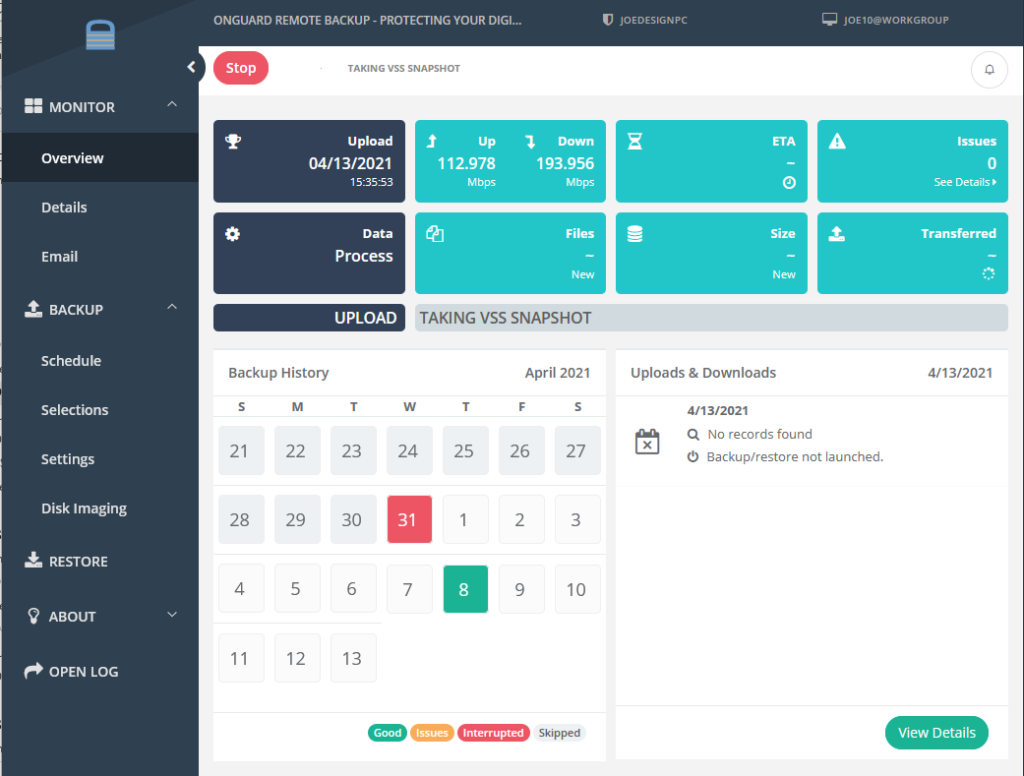
The Overview tab provides you with a calendar view of your most recent backups, highlighting which dates backups occurred with color codes indicating if the latest backup on each date was good, had issues, or was interrupted and did not complete.  So, for example, in the screen capture below we see that a backup completed on December 10th with issues, and a good backup completed on December 11th.

The top right portion of the Overview tab indicates the status of the most recent backup completed, if a backup or restore is not currently running, or the status of the currently running operation.  In the screen capture below we see that the most recent completed backup was on December 11th and 1 changed file was backed up.

When a backup or restore is running, the Overview tab shows a dynamic view of what is transpiring, as shown below.

In the above “live” example, the top right panel shows that 64 files are to be backed up of size 383.0MB, and that the backup is 44% complete (this is also shown graphically along the bottom of the window with the green percent complete band) and should be completed in approximately 8 seconds.  The top right panel also shows the upload and download network “bandwidth” the client has.  In addition, please note the “Stop” button which you can use to terminate a backup or restore.

While a backup or restore is running, the lower half of the window shows information on the status of the current file being backed up, such as it’s name, size, and progress, as shown below.

At the very bottom of the window there is a table which will show issues, if any, which have occurred during the backup or restore so far.  In the example below a warning was thrown for the junction point “E:\test#123\mounted_vol”

Protecting Windows Server Disk Images with Onguard Remote Backup

Posted on

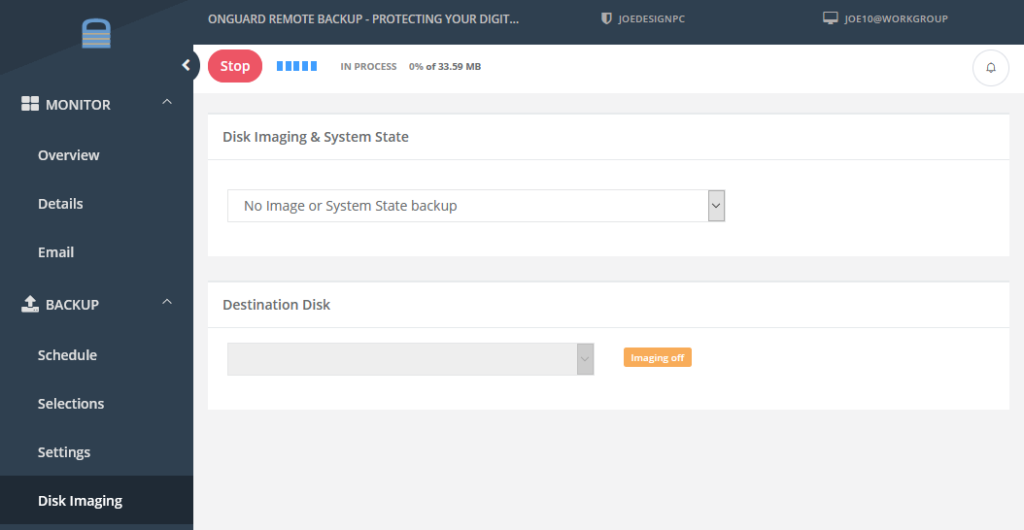
The Windows Disk Images tab allows you to perform a full bare metal recovery of your computer. Bare metal backup saves your current system state at the time the backup is run, allowing you to quicky go back to a point in time before an issue occurred. Onguard Remote Backup leverages the wbadmin command that is built in to Windows to make bare-metal disk images that are usable to recover a system through a Windows Recovery Environment.

Considerations:

  • The wbadmin command was introduced with Windows Server 2008 and Windows Vista, so earlier versions of Windows (XP/2003 and older) are not able to utilize this client-side feature.
  • The ‘backupTarget’ syntax designates the drive the disk images will be saved to.
  • The ‘include’ syntax allows for non-critical drives to be added to the disk images. If no non-critical drives are selected, it is not included in the syntax.
  • The ‘allCritical’ syntax is key for creating a system-restorable disk image backup.
  • The ‘vssFull’ syntax will be added if you have selected the VSS_FULL backup mode on the Expert Settings tab, which is visible when you enter Expert mode on the client.
  • The ‘quiet’ syntax prevents wbadmin from waiting for user input when performing the disk image backup.

When the Windows Disk Image backups are enabled, the above command will run with every scheduled backup, and it will save the disk images to the destination hard drive; it will create a WindowsImageBackup folder, that will contain sub-folders with the Windows disk image (.VHD), as well as many small meta-data files.

The destination drive can be either a local hard drive, network mapped drive, or (preferably) a local USB hard drive. A local drive is preferable to a network mapped drive because if it is done to a local drive, it will fully utilize VSS snapshots to keep a history of prior disk image backups. Done over the network, this is not possible, so only the latest disk image will be available.

When done to a local USB drive, it allows you to have a portable solution with multiple versions available for you to use in a Windows Recovery Environment to restore a system to its original hardware, or on to replacement hardware.

In addition to this local copy of the disk image, you can add the disk images to your backup selections to your Onguard Remote Backup Service.

The .VHD files associated with these disk image backups will be very large. On a very minimal Windows Server 2008 R2 install, the .VHD is over 25 GB. On a fully deployed server environment running services like SQL or Exchange, it will be much larger. You should account for this when you perform the initial remote backup for this data. One option would be to do a local seed that can then be moved to your remote server. Thankfully, these .VHD files perform well under differential scans, so after the initial seed the subsequent backups of the .VHDs will be quicker.

The initial time you run the disk image backup, it will take a long time to run. This is due to first the wbadmin command taking a long time to create the initial .VHD, and second the time it takes to compress and encrypt the .VHD. Please be sure to allow a few extra hours for the backup to run the first time a disk image backup is done.

Installing the Windows Server Backup Feature

Although wbadmin comes installed by default on consumer-grade Windows such as Windows 7, you need to ensure that the ‘Windows Server Backup’ features are installed on the server versions of Windows. To make sure you have the feature installed, you can check from the Server Manager:

1) Open Server Manager

2) Go to Features, click on ‘Add Features’

3) If ‘Windows Server Backup Features’ is not selected, select it and make sure ‘Command-line Tools’ is also selected.

4) If you had to select them, make sure to install the features.

Enabling and Configuring Disk Images

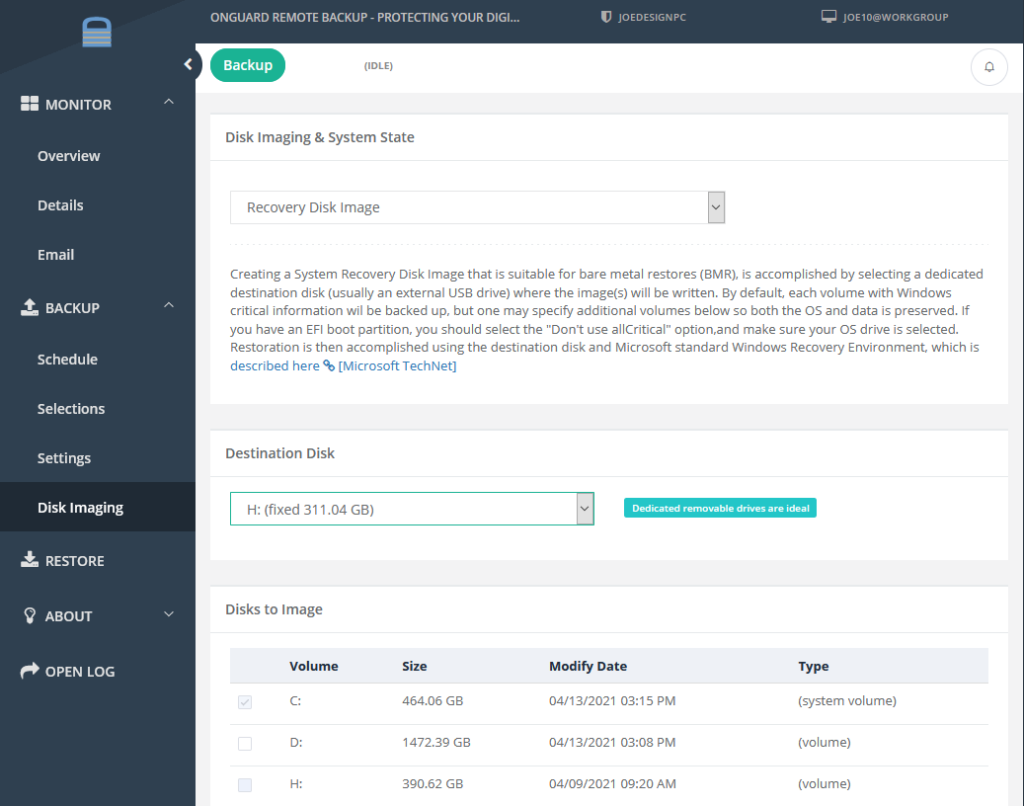
To enable the disk images, check the ‘Enable Windows System Recovery’ option at the top of the Windows Disk Images tab.

This will then allow you to select the Destination disk, which may be any local drive attached to the computer. The destination disk can NOT be the same as one of the disks you intend to back up in this manner. This is another reason a USB hard drive is preferable.

With the Destination set, you should then select which other local drives you want backed up in the “Selected disk(s) to image” field. The Destination disk will be greyed out to prevent its selection. You also cannot deselect any critical system volumes (usually the C:\).

With the above options set, the Windows disk image backup will run with every scheduled backup, but it will be only to the local destination disk. If you want the disk images to be uploaded to your server, you will need to enable remote backups as described below.

Remotely Backing Up Windows Disk Images

With Windows disk images enabled, you are then able to add the disk image backups to your scheduled remote backup data set. This is done by selecting the days of the week you want the backup to be backed up remotely. Selecting Everyday, Weekday, or Weekend will select the appropriate individual days.

As with all large files, it will take a substantial amount of time for the backup process to compress, encrypt, and do a differential scan on the large .VHD file generated by the Windows disk image backup. This will be the case even after the initial backup of the .VHD, because the compression and encryption must be run each time a file is to be analyzed for backup.

You must ensure that there is enough free cache space available for the compression and encryption of the .VHD file can be done. It is recommended that there is 2.5 to 3 times as much free space available for cache space as the largest file that is being backed up, which is likely to be the .VHD file. It is a good idea to not include the Windows disk image backup in your remote backup set until you know the overall size of the .VHD.

Retention and Versions in Onguard Remote Backup

Posted on

The meaning of these settings is as follows.

At the end of a backup, a file retention rollup process takes place where the client determines what old versions of files it may delete from its own local backup folder as well as the Onguard Remote Backup Service.

If retention is a number greater then zero then the backup date of every file contained in the backup vault(s) is checked such that any versions of files backed up more then retention days ago are deleted if there exists one or more versions of those same files which have been backed up more recently in the vault(s).

Next, if version is a number greater then zero then a search is done for any files in the backup vault(s) where there exists more then version numbers of those files, and the oldest versions of those files are then deleted until there exists no more then version of them in the backup vault(s).

Please also check out the “preservedeleted” INI setting, which can also be selected interactively on the Expert Settings tab.