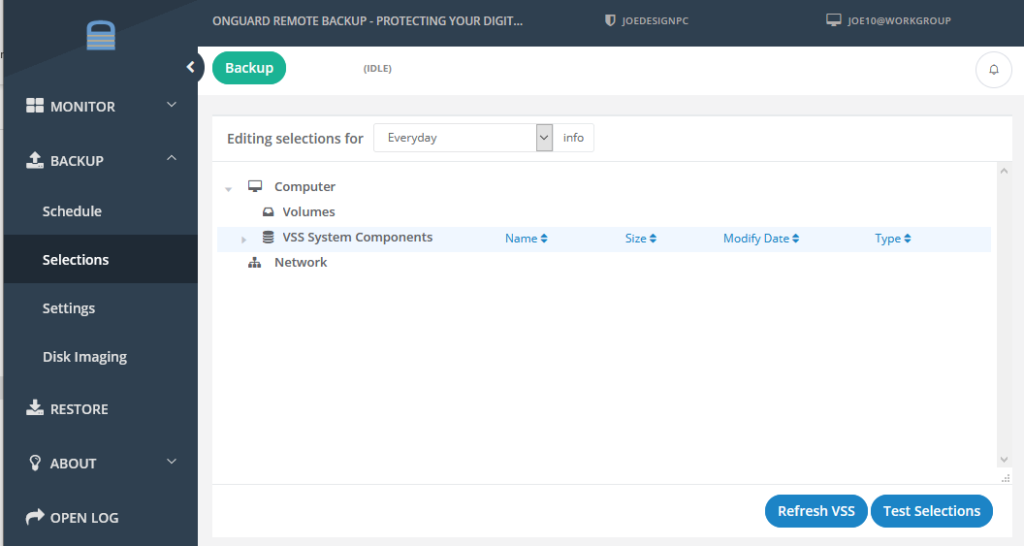
Open the client, and then on the Backup->Selections tab expand Computer and then “VSS System Components” and select the “SQL Server Writer” in the right hand pane.
If you double click on “SQL Server Writer” in the right pane you’ll see precisely which databases will be selected to backup. If you only wish to back up selected databases from this list, you can manually select them. Or if you wish to exclude certain databases, make sure they have a red “X” beside them.
Onguard Backup allows multiple computers to backup to the same account, and it allows each computer to restore data from any of the computers backed up to its account. There are times when a computer crashes and is replaced with a new one, and one wishes for the new computer to resume the backups of the computer it replaced. To accomplish this you simply need to impersonate its predecessor.
To impersonate a different computer (so that you can permanently backup and restore as the old computer), first launch the GUI using the -account parameter as follows:
Open the Windows Command Prompt as Administrator
Change directories to the installation directory and launch the GUI in -account mode
at the prompt: C:\Users\Administrator>, type in: cd \
at the prompt: C:\>, type in: cd Program Files
at the prompt: C:\Program Files>, type in: cd Onguard
at the prompt: C:\Program Files\Onguard>, type in Onguard_gui.exe -account
You’ll now see an “Account” tab:
You can change the Domain/Computer for this software client using the pull-down menu near the bottom of the window and then clicking on the “Impersonate selected domain/computer…”.
You should only impersonate another computer if it is no longer online (i.e. it can’t backup anymore) and you wish this computer to continue on with its backups and restores. If you wish to just restore from another computer then please refer to the restore article which shows how to do this.
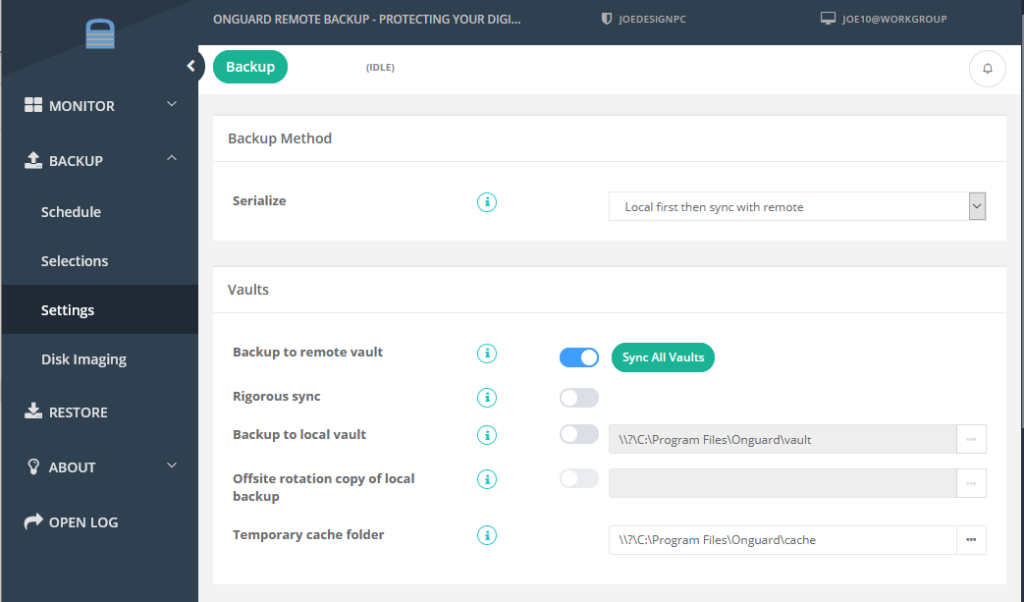
Onguard Backup allows you to control where you backup to, whether it’s to a local hard drive or our remote storage vault by going to the Backup->Settings tab.
For example, you can specify whether you would like to backup to a local folder in addition to backing up to a remote server, as well as whether you wish these backups to run in parallel, or for the remote backup to wait until your local backup has completed.
Please note that choosing “Rigorous sync” will force the vault synchronization process, either at end of a backup or using the manual “Synchronize all Backup vaults…” button, to check for the presence of each block in each vault’s storage (disk) against what the backup history believes is present which will slow down synchronization substantially when millions of blocks are present in vaults. This option is used if your backup host suspects they have lost some blocks and they are using multiple vaults or the client has a local and remote vault.
To support users in rotating local backups offsite, one may use the “For offsite rotation..” option to have your local backup folder copied to the rotatable folder, which is usually a USB drive.
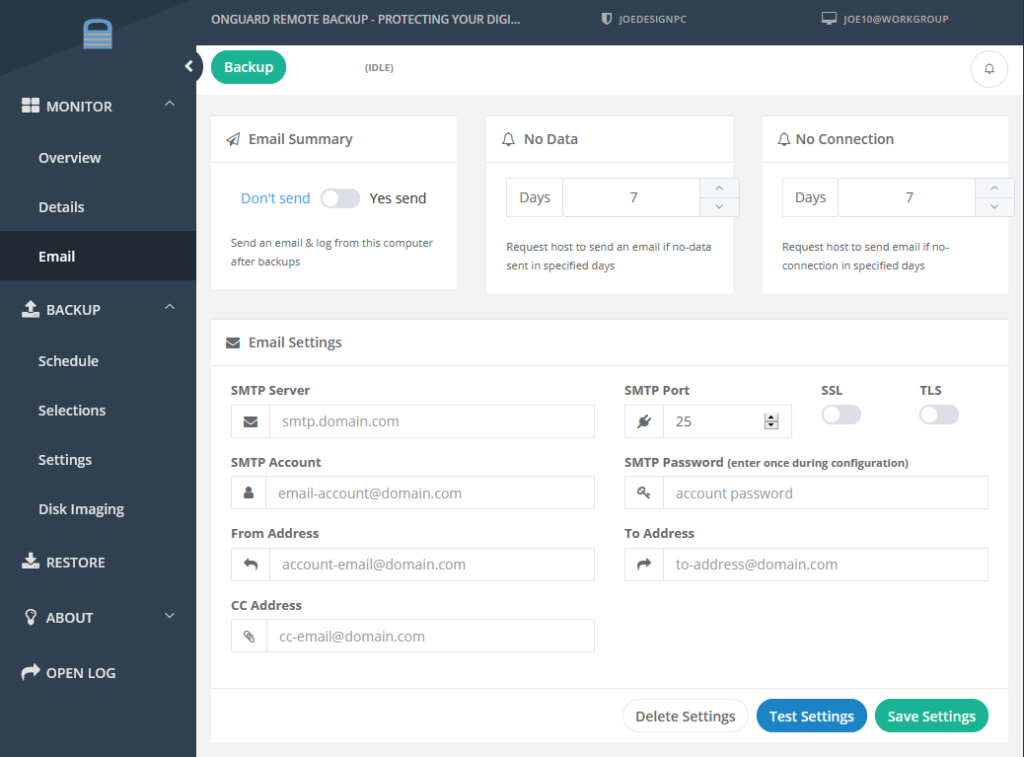
The E-Mail tab allows you to configure the client to send you e-mails after each backup, as well as tell your backup host when you would like to be alerted if your client does not connect to the backup server to send data (or it connects but doesn’t send any data).
To configure the client to send e-mails it must have an e-mail account to use.
To send all your backup logs to someone, for example technical support, simply fill in the email address you’d like all your logs emailed to and click the “E-Mail logs now to:” button.
You can modify where temporary files are created and where logs are stored (and for how long) on Backup->Settings tab:
Similarly you can specify how many days of logs to preserve in the above folder on that same tab using the following control:
The temporary folder is used as temporary scratch working space to do things such as dump Microsoft Exchange so that eseutil can be run, to compress and uncompress files, to encrypt and decrypt files. etc. In general, the maximum space used in the temporary folder is a little more then 3X the size of the largest file being backed up. Since files can be processed in parallel, this factor needs to be multiplied by the number of files currently being backed up simultaneously (which is usually in the single digits).
You can control how much free space to keep on any volumes which data is written to (such as temporary folder, log folder, restore folder) via opening the GUI in expert mode and changing the following setting on the Expert Settings tab.