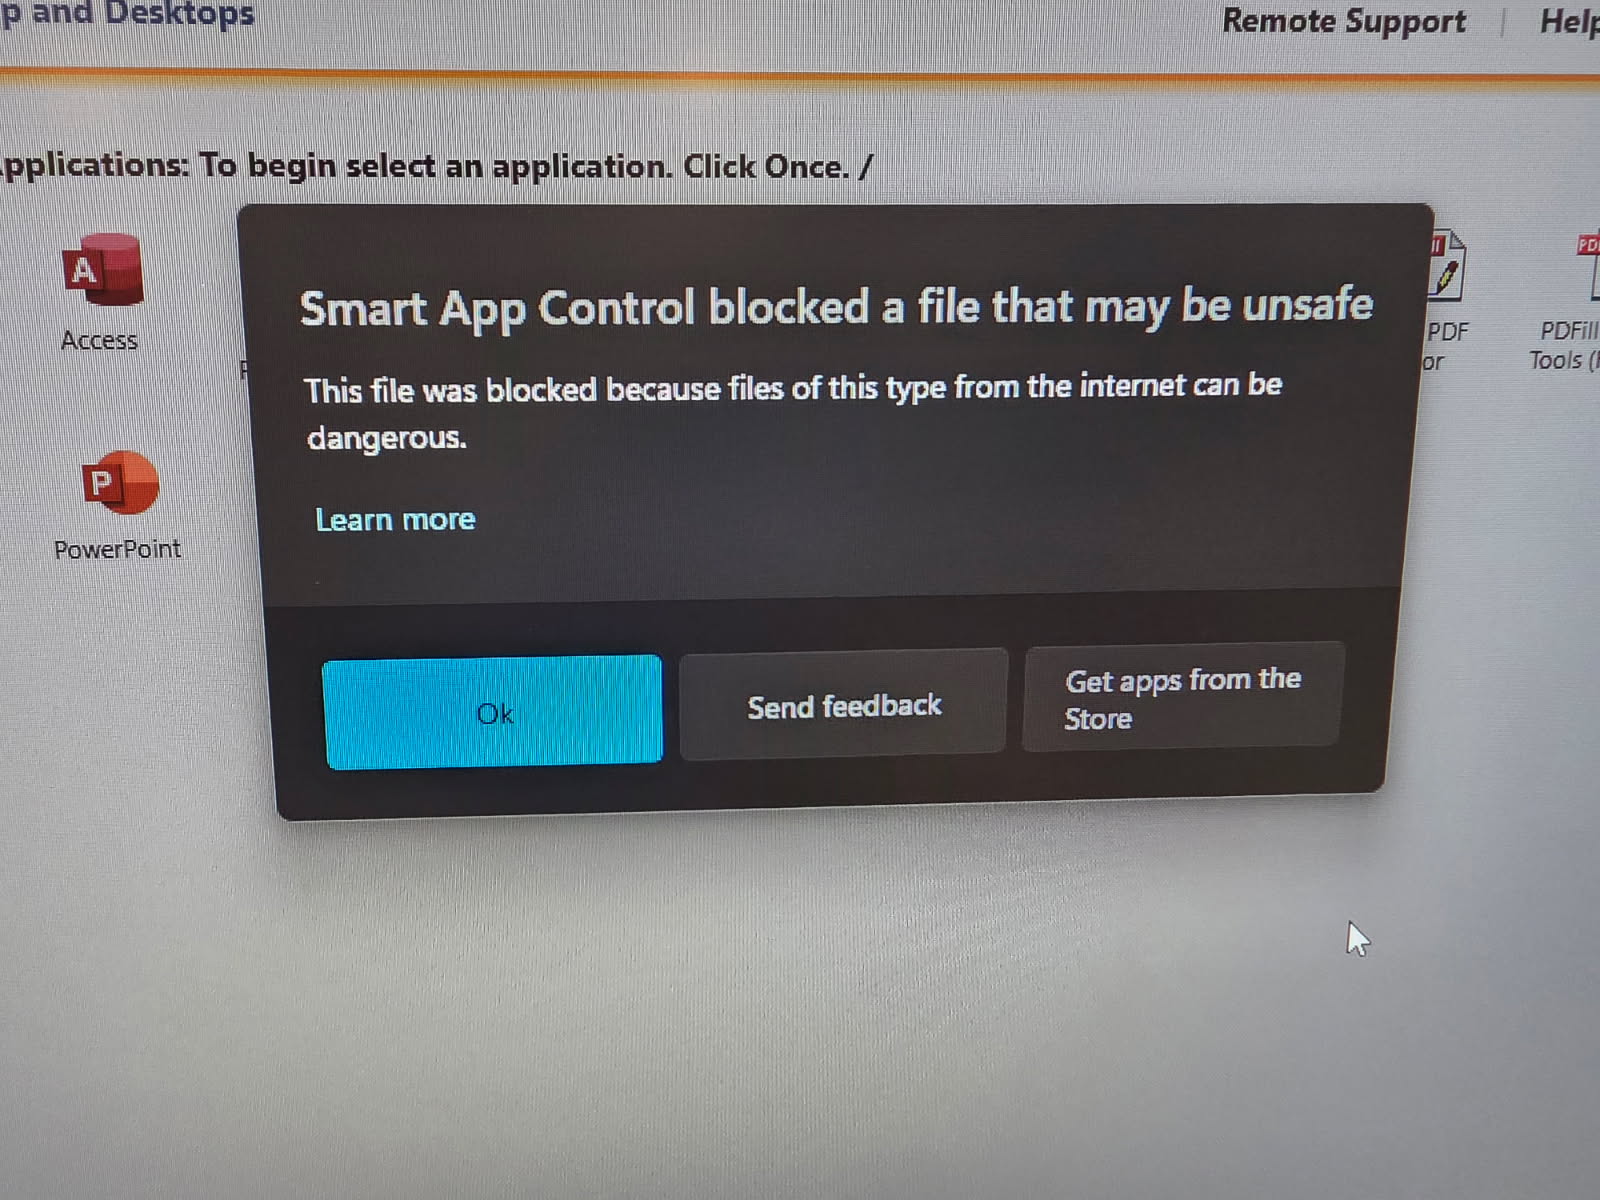
A recent windows update may have enabled a new windows 11 feature called Smart App Control. When enabled you may not be able to access your remote apps and you will be presented with the following error:
To disable it, do the following:
In windows 11 settings, go to Windows Security > App and browser control > Smart App Control settings
Enter the following settings directly on your device or in the application as their guide instructs (it might use different terminology than this article). As long as your scenario meets the requirements for SMTP AUTH client submission, the following settings will enable you to send email from your device or application.
Device or Application setting
Value
Server/smart host
smtp.office365.com
Port
Port 587 (recommended) or port 25
TLS/StartTLS
Enabled
Username/email address and password
Enter the sign-in credentials of the hosted mailbox being used
Limitations of SMTP AUTH client submission
You can only send from one email address unless your device can store login credentials for multiple Microsoft 365 or Office 365 mailboxes.
Option 2: Send mail directly from your printer or application to Microsoft 365 or Office 365 (direct send)
Choose this option when:
Your environment has SMTP AUTH disabled.
SMTP client submission (Option 1) is not compatible with your business needs or with your device.
You only need to send messages to recipients in your own organization who have mailboxes in Microsoft 365 or Office 365; you don’t need to send email to people outside of your organization.
Other scenarios when direct send may be your best choice:
You want your device or application to send from each user’s email address and do not want each user’s mailbox credentials configured to use SMTP client submission. Direct send allows each user in your organization to send email using their own address.
Avoid using a single mailbox with Send As permissions for all your users. This method is not supported because of complexity and potential issues.
You want to send bulk email or newsletters. Microsoft 365 or Office 365 does not allow you to send bulk messages via SMTP client submission. Direct send allows you to send a high volume of messages.
There is a risk of your email being marked as spam by Microsoft 365 or Office 365. You might want to enlist the help of a bulk email provider to assist you. For example, they’ll help you adhere to best practices, and can help ensure that your domains and IP addresses are not blocked by others on the internet.
Settings for direct send
Enter the following settings on the device or in the application directly.
Device or application setting
Value
Server/smart host
Your MX endpoint, for example, contoso-com.mail.protection.outlook.com
Port
Port 25
TLS/StartTLS
Optional
Email address
Any email address for one of your Microsoft 365 or Office 365 accepted domains. This email address does not need to have a mailbox.
We recommend adding an SPF record to avoid having messages flagged as spam. If you are sending from a static IP address, add it to your SPF record in your domain registrar’s DNS settings as follows:
DNS entry
Value
SPF
v=spf1 ip4:<Static IP Address> include:spf.protection.outlook.com ~all
Option 3: Configure a connector to send mail using Microsoft 365 or Office 365 SMTP relay
This option is more difficult to implement than the others. Only choose this option when:
Your environment has SMTP AUTH disabled.
SMTP client submission (Option 1) is not compatible with your business needs or with your device
You can’t use direct send (Option 2) because you must send email to external recipients.
SMTP relay lets Microsoft 365 or Office 365 relay emails on your behalf by using a connector that’s configured with your public IP address or a TLS certificate. Setting up a connector makes this option more complicated.
Settings for Microsoft 365 or Office 365 SMTP relay
Device or application setting
Value
Server/smart host
Your MX endpoint, for example, yourdomain-com.mail.protection.outlook.com
Port
Port 25
TLS/StartTLS
Enabled
Email address
Any email address in one of your Microsoft 365 or Office 365 verified domains. This email address does not need a mailbox.
If you already have a connector that’s configured to deliver messages from your on-premises organization to Microsoft 365 or Office 365 (for example, a hybrid environment), you probably don’t need to create a dedicated connector for Microsoft 365 or Office 365 SMTP relay. If you need to create a connector, use the following settings to support this scenario:
Connector setting
Value
From
Your organization’s email server
To
Microsoft 365 or Office 365
Domain restrictions: IP address/range
Your on-premises IP address or address range that the device or application will use to connect to Microsoft 365 or Office 365
We recommend adding an SPF record to avoid having messages flagged as spam. If you are sending from a static IP address, add it to your SPF record in your domain registrar’s DNS settings as follows:
DNS entry
Value
SPF
v=spf1 ip4:<Static IP Address> include:spf.protection.outlook.com ~all
Google Chrome’s latest update changes windows file associations for PDF Files, setting itself as the default reader. To switch it back to Adobe Acrobat you’ll need to do the following:
Right Click on any PDF File and go to properties
Next to Opens With, click Change
Select Adobe Reader
Hit OK
All of your pdf icons should change back to the Adobe one and when you go to open a pdf, adobe reader should now come up.
From wintips.org. If you have created a mirrored volume on Windows and do you don’t want the mirror anymore, then read this tutorial to learn how to remove or break the mirror. Before removing or breaking a mirror, it is important to understand the difference between these operations.
What is the difference between the ‘Break Mirror’ vs the ‘Remove Mirror’ option? The “Break Mirror” operation, will stop the mirroring on the selected volume, without affecting the data on any disk. (Data will remain untouched on both disks).
The “Remove Mirror” operation, will stop the mirroring on the selected volume and destroys all the data on the mirror disk. (Data will remain only on one disk).
What option to choose? Break Mirror or Remove Mirror? The decision between breaking or removing mirror, must be based on your needs. For example: If you need extra space on your system then choose the “remove mirror” option, but if you want to use the disk in another computer, in order to use your current Windows configuration, then you must choose the “break mirror” option. If you don’t know yet what to do, then prefer the “Break Mirror” option, which keeps all your data in both disks intact, until you decide.
In this tutorial you ‘ll find detailed instructions on how to break or remove hard drive mirroring on Windows.
How to Break Hard Disk Mirror on Windows 10, 8 or 7 OS.
To break disk mirroring:
1. Press the “Windows” + “R” keys to load the Run dialog box. 2. Type diskmgmt.msc and press Enter.
3. Right click on the Volume that you want to break the mirror and select Break Mirrored Volume.
4. At the next screen, carefully read the warning message and click Yes. *
* Caution: After breaking the mirror, you data will remain on both disks but you remains will no longer be fault tolerant.
How to Remove Hard Disk Mirror on Windows 10, 8 or 7 OS.
To remove disk mirroring:
1. Press the “Windows” + “R” keys to load the Run dialog box. 2. Type diskmgmt.msc and press Enter.
3. Right click on the Volume that you want to remove its mirror and select Remove Mirror.
4. Carefully select from which disk you want to remove the mirror of the selected volume selected and click Remove Mirror. *
* Caution:This action will destroy all the data on the selected disk and after removal the space used for the mirror will appear as “Unallocated”.
That’s it! Let me know if this guide has helped you by leaving your comment about your experience. Please like and share this guide to help others.